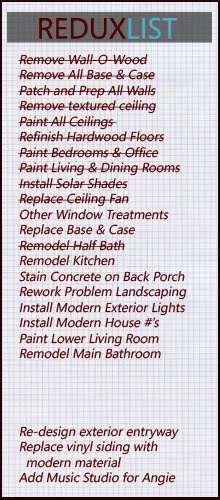
As you can see by looking at the Redux List on the sidebar, a complete bathroom remodel had been in the works since we purchased the house in 2008. And we had been saving links and pictures of ideas and inspiration along the way. Nonetheless, we still viewed the start date as a year or two away. However, there were two issues that drove this project to the forefront.
We believe the previous owners renovated the bathroom in the early-90s. That meant by the time we moved in, the toilet was approximately 16 years old. Almost from the start, it was apparent that the closet flange had rusted and the toilet was not securely fastened to the waste pipe. Two years later, the tank developed a leak. Although I could have replaced the gaskets and tank bolts, with a remodel down the road, I decided just to order another Toto Aquia. When I pulled the old toilet, the cast iron flange was completely toasted and I couldn't get a replacement ring fastened down because the subfloor did not hug the waste pipe -- so there was nothing solid to fasten it to. I tried my best with some blocking, and it held for a week (or two), but soon loosened again. Plus there were issues with the unique Toto flange adapter and the levelness of our floor such that I was honestly afraid that we would crack the porcelain on the toilet every time we gingerly sat down on it. When the plumber was there to finish the kitchen, he gave me an $800 quote to fix it. No way were we throwing that kind of money into a temporary fix when we knew we were close to a complete gut remodel.
The second issue involved the shower's water valve. It was approximately 16 years old as well and within the last 6 months, had become very temperamental in fully shutting off the water. And I'm not talking a drip (or even a fast drip). I'm talking a low flow stream of water coming from the spout when in the OFF position such that you'd have to turn it back on and off a few times in order to catch it just right. I feared that at any moment, we'd using the angle stop valve (accessible from a small access door in a bedroom closet) to turn the water on and off. Although I didn't get a quote on this repair, I assumed it would be a substantial undertaking and again, we didn't want to dump money into a short-term fix.
So as soon as the lower living room project wrapped up the end of November, we dove head first into planning the main bathroom. It was an intense time to plan a complete bathroom redux. A bullet list will make it easier to digest:
-Went through all our links -- kept the good ones, got rid of the bad ones
-Viewed our inspiration photos and jotted down our favorite ideas in a Word document
-Decided on a contractor (a process I explained in more detail
here) and ensured that he was available and could complete the project on our tight timeline
-Visited
R.F. Fager & Company, a local bathroom showroom/distributor our contractor works with and started building a materials quote list. Although I had already sourced many of our materials/fixtures, there were still some holes to fill, and I found that working with folks who do this for a living has advantages to simply researching and ordering everything online. In the end, I had a great experience working with Fager's.
-Visited every tile store within 10 miles of our home -- pulled samples from different ones and got prices while we were there
-Visited Fagers, Home Depot, Lowes and Just Cabinets to look at various cabinet options. Every store had something a little different to offer at different price ranges. Obviously some places (Fagers and Just Cabinets) were a bit more knowledgeable than others. Did layouts, got pricing and lead times (so important when you're on a tight timeline) at Home Depot, Fagers and Just Cabinets. Went through a number of redesigns at Fagers and Just Cabinets after meeting with our contractor.
-Visited nearly every countertop fabricator within 30 miles to hunt down a quartz remnant -- ultimately failed at this and ended up deciding on a new slab from
Lesher Marble -- the fabricator that installed our kitchen quartz (and the first place we visited)
-Developed a
specification list in Word that covered our desired materials, demo, rebuild and design choices. This spec list was heavily edited during the entire planning process and it was used as the main document when I did the walk-through with our contractor so he could develop a quote.
-Finalize material selections (cabinets, fixtures, tile, countertops) and get firm quotes to contractor.
-Review contractor's quote, let the initial shock wear off(!), get back with your contractor on questions/issues/possible cost cutting areas and then sign the contract and cough-up the down payment
Again, this is a bullet list. We hope to discuss more of these in detail in future posts. As we mentioned, the process started in late-November and we signed the contract in mid-January. Ideally, we would have loved to have taken three months to flesh out the details of this project, but the issues above and our second child due in early-March dictated otherwise.
If you've read along this far, we believe you deserve a peek at our final material selections. Shower tile on left. Countertop on left. Floor tile on right. Cabinet (Java Stain on Cherry wood) in back. Along with the various paint options.


+copy.jpg)