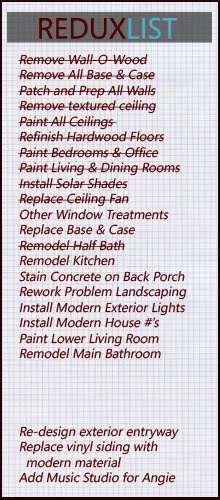
So I've become THAT guy. You know, the one who still has a Christmas post up in early-March. Not much going on around here redux-wise, hence the lack of posts. IKEA kitchen planning is underway, but no where near the time to begin sharing that. I do have some older redux highlights(?) that have yet to be posted, so journey back in time with us.
All of the baseboard and door casement in the house was the standard that was available in 1958. Surprisingly, its still the same design that you see in many houses built today. I'm not sure if that's a testament to its staying power, or pure apathy on the part of home builders and consumers. You can debate that in the comments!
As you can see, it was all pretty beat-up (from when the carpet was laid) and had multiple layers of paint. So when we ripped out the carpet, the base and case went with it -- those were the first two projects we actually completed in the house. We lived for quite some time with no trim in the majority of the house, even after the floors had been refinished and the walls painted.
It wasn't until Spring of 2010 when I finally got around to the task. My dad, who knows his way around a miter cut, came up for a few days and we were able to knock out many, many linear feet of base and door case. I went with a squared-off poplar 1"x4" base and 1"x3" case. These particular dimensions don't come pre-primed, so I spent the week before install priming and double-coating every single piece of trim. It was a lot easier prepping these pieces on sawhorses in the garage than on my hands-and-knees after installation, so I would highly recommend this approach. There's no doubt you have to go back and touch up a few areas, but you do this when you go back and fill the nail holes anyway, so it worked out. I borrowed a nail gun from a friend, which proved invaluable. In fact, I would suggest either purchasing your own, or renting one to complete a job like this, especially for a DIY'er. Trust me, you'll be running in and out of the house measuring and cutting multiple times for each piece of trim and the time the nail gun saves is just phenomonal. Not to mention the lack of any hammer mis-hits, either on your finger or the piece of trim itself.
And here's a shot that gives a good sense of the depth of the trim.
I used the same base trim for the stairs. The "go to" piece of trim here would be a piece of quarter round, but I wanted a more modern, chunky look. I should also note that I used a 1"x1" square piece of poplar for the transistion from the floor to the step riser.
The final piece of the puzzle was the trim for the three-steps that lead from the ground floor to the middle floor of our split level. Again, the typical "go to" is a piece of quarter round, which I was looking to avoid. But the base I used for the other steps wasn't going to work here, as it was too deep. So I ended up going with a 1/2"x4" piece of poplar.
It was a big job, but well worth it in the end.
05 March 2011
Subscribe to:
Post Comments (Atom)


+copy.jpg)


2 comments:
looks great. cant wait to see more info on the ikea kitchen
That's a nice try for the modern home, but the baseboard do need to go along with the overall feeling/design of the house. If you apply the base board to a historical house that might be awkward, otherwise it's a nice try.
Post a Comment